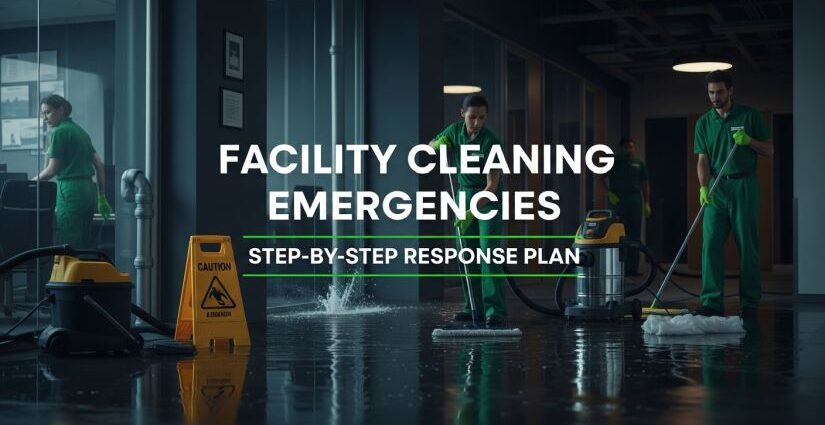
When a burst pipe floods your office at 3 a.m., or a chemical spill shuts down your production floor mid-shift, every second counts. Facility cleaning emergencies demand more than a mop and good intentions—they require a quick response, proper emergency equipment, and a clear response plan that protects people, property, and your business continuity.
Rich Greco, owner of ProTex Janitorial Services, has spent more than three decades responding to workplace emergencies across North Idaho and Eastern Washington.
“I’ve seen facility managers try to handle everything themselves when a water line breaks or a chemical container tips over,” Greco explains. “The difference between minor damage and a major disaster often comes down to having the right emergency preparedness systems in place before something goes wrong.”
This guide provides facility managers with actionable spill response procedures, leak containment tactics, and clear decision trees for when to call in professional cleaning services. Whether you manage an office building in Coeur d’Alene, a manufacturing plant in Spokane, or a medical facility in Sandpoint, you’ll gain the knowledge to respond quickly and effectively when unexpected incidents strike.
Key Takeaways
- Stop-Alert-Contain-Clean is the universal protocol for any facility cleaning emergency—source control prevents small incidents from becoming major disasters
- Water damage categories (clean, gray, black) and types of spills (chemical, biohazard, oil) require different cleanup procedures and personal protective equipment
- OSHA 1910.1030 bloodborne pathogens standards, IICRC S500 water damage protocols, and EPA List N disinfectants form the regulatory backbone of professional emergency response
- Spill kits stocked with absorbent materials, PPE, and neutralizers must be inspected monthly and placed strategically throughout your facility
- Time-sensitive drying goals (24-48 hours) prevent mold growth after water intrusion—delays exponentially increase remediation costs and health risks
- Knowing when DIY cleanup ends and professional intervention begins protects your team from exposure to bloodborne pathogens, hazardous chemicals, and structural contamination
Understanding Facility Cleaning Emergencies
Facility cleaning emergencies differ from routine maintenance in three critical ways: speed, safety risk, and potential for compounding damage. A coffee spill in the breakroom is routine maintenance. A burst pipe flooding your server room at 2 a.m. is an emergency that threatens
Critical Response Timeline
Time-Sensitive Actions Following Water Intrusion Events
- Begin water extraction
- Remove standing water completely
- Start structural drying process
- Category 1 water still clean
- Minimal bacterial growth
- Water degrades to Category 2
- Bacterial growth accelerates
- Mold spores begin colonizing
- Odors start developing
- Professional drying essential
- Visible mold growth likely
- Structural damage worsens
- Health hazards increase
- Remediation costs escalate
- Full restoration required
- Extensive mold colonization
- Serious structural compromise
- Major health risks present
- Document/content loss
- Major reconstruction needed
The first 24 hours determine whether you face a cleanup operation or a full restoration project. Every hour of delay exponentially increases remediation costs and health risks. Professional extraction must begin immediately to prevent mold colonization and structural damage.
What Qualifies as an Emergency?
An incident becomes a facility cleaning emergency when it meets one or more of these criteria:
- Immediate health threat: Exposure to bloodborne pathogens, chemical spills, or sewage contamination creates infection or poisoning risks
- Safety hazard: Standing water, slippery surfaces, or toxic fumes generate slip-and-fall or inhalation dangers
- Property damage: Water intrusion threatens electronics, documents, or structural integrity
- Business interruption: The incident prevents normal operations in critical work areas
- Regulatory violation: The situation creates OSHA, EPA, or health department compliance failures
“The worst decision a facility manager can make is waiting to see if a problem resolves itself,” Greco notes. “Water doesn’t stop spreading, chemicals don’t neutralize on their own, and biological hazards multiply by the hour. Your emergency response timeline starts the moment you discover the incident, not when it’s convenient to deal with it.”
Common Types of Facility Emergencies
Water-Related Incidents
Category 1 clean water originates from sanitary sources like supply lines, but becomes progressively contaminated over time. A burst pipe or sprinkler discharge starts as Category 1 but degrades to Category 2 gray water (containing contaminants) within 48 hours if left standing. Category 3 black water from sewer backup cleanup situations or flood water contains harmful bacteria and requires immediate professional intervention.
According to IICRC S500 water damage standards, facilities must begin water extraction within 24 hours to prevent secondary damage. Common water emergencies include:
- Burst pipes and supply line failures
- Roof leak response situations during storms
- HVAC condensate overflow from clogged drain pans
- Sprinkler system malfunctions
- Toilet or urinal overflows
- Water heater failures
Chemical Spills
Types of spills range from minor cleaner leaks to major hazardous chemical spills requiring evacuation. Your chemical spill response begins with consulting the Safety Data Sheet (SDS) for the specific substance, which outlines proper PPE, ventilation requirements, and neutralization procedures.
Small chemical spills (less than one gallon, non-hazardous) may be within your custodial team’s capabilities if they have proper training and equipment. Large chemical spills, anything involving corrosives, flammables, or unknown substances, demands professional emergency cleaning service response and possibly hazmat team involvement.
The NFPA 704 hazard ratings diamond on chemical containers provides instant visual guidance: blue (health), red (flammability), yellow (reactivity), and white (special hazards). Facilities storing multiple chemicals must prevent ammonia and bleach incompatibility storage situations that can generate deadly chlorine gas hazard if mixed.
Biohazard Incidents
Any situation involving blood, bodily fluids, or medical waste triggers OSHA 1910.1030 bloodborne pathogens protocols. Biohazard cleanup protocol requires specific training, appropriate PPE, and proper waste disposal procedures to protect cleaning staff from HIV, hepatitis, and other infectious diseases.
Common biohazard emergencies include:
- Blood spills from workplace injuries
- Vomit or feces contamination
- Needle stick incidents requiring sharps container handling
- Sewage backups containing human waste
Structural Damage Situations
Post-event cleanup following fires, storms, or construction accidents combines multiple emergency types. Wildfire soot cleanup basics require HEPA filtration to prevent respiratory exposure, while ceiling tile leak indicators signal potential hidden water damage in ceiling cavities that can collapse without warning.
The Stop-Alert-Contain-Clean Framework
Every facility cleaning emergency response follows the same four-step sequence, regardless of the incident type. This emergency response framework prevents chaos, reduces liability exposure, and ensures proper documentation for insurance claims.
The Universal Emergency Response Framework
Four Essential Steps for Every Facility Cleaning Emergency
Step 1: Stop the Source
Source control first—before you grab a mop or call anyone, eliminate the cause of the incident if possible:
- Water emergencies: Turn off the water supply at the nearest shutoff valve. Every facility manager should know their water main shutoff location
- Chemical spills: Upright containers, close valves, or move leaking items to secondary containment
- Electrical hazards: Cut power to affected areas if water threatens electrical panels or equipment
“I’ve responded to situations where someone spent 20 minutes mopping while water kept pouring from an open valve they could have closed in 10 seconds,” Greco recalls. “Stop the source, then manage the mess. That order matters.”
Create a site map with shutoffs clearly labeled and laminated copies posted in janitorial closets, security offices, and maintenance shops. Include the gas shutoff location and electrical panel labeling on these maps.
Step 2: Alert the Right People
Your emergency communication system activates the moment an incident occurs. Who needs to know, and in what order?
Immediate notifications (within 5 minutes):
- Emergency services if injuries, fire, or hazmat situations exist
- Facility management and building security
- Safety officer for incidents involving chemicals or injuries
Secondary notifications (within 15-30 minutes):
- Professional cleaning services for situations exceeding in-house capabilities
- Insurance company for potential claims documentation
- Department managers affected by area closures
- IT department if electronics are threatened
Maintain an emergency contact list with after-hours phone numbers for all critical vendors, including your specialized cleaning provider. This list should include local emergency numbers beyond just 911—poison control, utility companies, and your building’s property management contacts.
Step 3: Contain the Affected Area
Leak containment and spill control prevent a localized incident from spreading throughout your facility. Containment strategies vary by incident type:
Physical Barriers
Deploy spill berm deployment tools—flexible barriers that create dams around liquid spills. For water intrusions, use wet vacuum extraction equipment to remove standing water before it migrates to adjacent rooms. Floor drain protection with drain cover mats prevents contaminated water from entering your facility’s plumbing system.
Absorbent Materials
Stock three types of absorbents in your spill kits:
- Universal absorbent pads and rolls work for most liquids including water, oils, and mild chemicals
- Oil-only absorbent materials repel water while soaking up petroleum products
- Chemical-specific absorbents like corrosive acid neutralizer or caustic base neutralizer for hazardous substance spills
Absorbent socks and booms surround spill perimeters, while absorbent pads soak up the bulk of the liquid. Change saturated materials frequently—one pad can typically absorb 15-20 times its weight.
Air Quality Control
For chemical incidents or water damage situations, establish negative air containment using HEPA air scrubbers that filter airborne particles. Proper negative pressure differential (keeping air pressure lower inside the contaminated zone than outside) prevents odors and contaminants from migrating to clean areas. Professional remediators target air changes per hour rates of 4-6 ACH depending on contamination severity.
Traffic Control
Implement cordon and signage setup immediately:
- Place wet floor signs at all approach points
- Use caution tape to mark boundaries
- Post guards at high-traffic entry points if needed
- Create traffic rerouting during cleanup paths
Slip, trip, and fall prevention during emergency cleanup prevents secondary injuries that compound your liability exposure.
Step 4: Clean and Restore
The cleanup process proceeds systematically from gross removal through final disinfection. For water damage, the IICRC S500 water damage standard prescribes specific drying goals and monitoring protocols.
Immediate Cleanup Actions
Start water extraction using wet vacuum equipment or submersible pump usage for deep flooding. A squeegee and floor scraper can push water toward extraction points. Time is critical—mold spores begin colonizing within 24-48 hours in moisture-rich environments.
For chemical or biohazard incidents, trained personnel wearing appropriate PPE remove gross contamination before applying disinfectant dwell time-appropriate products. EPA List N disinfectants are specifically approved for emerging viral pathogens, while hydrogen peroxide disinfectant and quaternary ammonium disinfectant formulations address bacterial contamination.
Drying and Dehumidification
Proper dehumidification plan implementation separates amateur cleanup from professional restoration:
- LGR dehumidifiers (Low Grain Refrigerant) excel in cooler environments and extract more moisture per kilowatt than conventional units
- Desiccant dehumidifiers work better in low-temperature or low-humidity starting conditions
- Air mover placement creates airflow patterns that accelerate evaporation from wet surfaces
- Moisture meter readings track progress toward drying goals
- Thermal imaging for moisture reveals hidden water in walls and ceilings
“Many facility managers don’t realize that just because a floor looks dry doesn’t mean it is dry,” Greco explains. “Water wicks up into drywall, hides in wall cavities, and saturates insulation where you can’t see it. Without proper moisture mapping and dehumidification, you’re setting yourself up for mold problems six weeks later.”
Structural Considerations
Water-damaged buildings require specialized techniques:
- Baseboard removal timing allows air to reach wall cavities
- Wall cavity weep holes drilled at floor level release trapped water
- Ceiling cavity drying tactics may require removing tiles to dry hidden spaces
- Poly sheeting containment with zipper wall installation isolates affected areas during intensive drying
Essential Emergency Equipment and Supplies
Your facility cleaning emergency response capability depends entirely on having the right emergency equipment readily accessible before incidents occur. Assembling supplies after discovering a spill wastes critical response time and allows contamination to spread.
Personal Protective Equipment (PPE)
OSHA 1910.1030 bloodborne pathogens standards mandate appropriate protective gear for staff handling potentially infectious materials. Your PPE inventory should include multiple size ranges:
Hand Protection
Nitrile gloves provide chemical resistance and barrier protection superior to latex. Stock heavy-duty 8-mil thickness for chemical handling and standard 4-6 mil for biohazard work. Change gloves between tasks and always practice proper hand hygiene after cleanup.
Eye and Face Protection
Chemical splash goggles with indirect ventilation prevent liquid splashes from reaching eyes during chemical work. Face shields add full-face protection when working with corrosives or during high-splash activities. Facilities must maintain emergency eyewash stations meeting ANSI Z358.1 eyewash compliance standards within 10 seconds of walk time from chemical storage areas.
Body Protection
Disposable coveralls prevent contamination of personal clothing and skin contact with hazardous substances. Tyvek suits provide splash protection, while heavier-duty chemical-resistant aprons protect against corrosives. Consider microfiber color-coding your reusable protective gear—red for restrooms, blue for general areas, yellow for food service zones—to prevent cross-contamination.
Respiratory Protection
Respirator selection depends on airborne hazard types. N95 particulate respirators filter non-oil-based particles but offer no chemical vapor protection. Organic vapor cartridge respirators protect against solvent fumes and volatile organic compounds (VOCs). All respirator users require fit test and seal check certification under OSHA 1910.134.
PPE Requirements by Emergency Type
OSHA-Compliant Personal Protective Equipment Selection Guide
| Emergency Type | Hand Protection | Eye/Face Protection | Body Protection | Respiratory Protection |
|---|---|---|---|---|
|
💧Clean Water (Cat 1)
|
✓ Required
Nitrile gloves
(4-6 mil) |
○ Optional
Safety glasses if splashing
|
○ Optional
Waterproof apron
|
○ Not Required
N/A
|
|
⚠️Gray Water (Cat 2)
|
✓ Required
Nitrile gloves
(6-8 mil) |
✓ Required
Goggles & face shield
|
✓ Required
Disposable coveralls
|
○ As Needed
N95 if odors present
|
|
☣️Black Water (Cat 3)
|
✓ CRITICAL
Double nitrile gloves
(8 mil+) |
✓ CRITICAL
Goggles & full face shield
|
✓ CRITICAL
Full body coveralls & boots
|
✓ CRITICAL
Full-face respirator
|
|
⚗️Chemical Spills
|
✓ Required
Chemical-resistant
(per SDS) |
✓ Required
Chemical splash goggles
|
✓ Required
Chem-resistant apron
|
✓ If Vapors
Organic vapor cartridge
|
|
🩸Bloodborne Pathogens
|
✓ CRITICAL
Nitrile gloves
(6-8 mil, doubled) |
✓ CRITICAL
Face shield & goggles
|
✓ CRITICAL
Fluid-resistant gown
|
○ As Needed
N95 if aerosolized
|
Always consult the Safety Data Sheet (SDS) for chemical spills to determine exact PPE requirements. OSHA 1910.1030 mandates bloodborne pathogen training and Hepatitis B vaccination for all employees with occupational exposure. Inadequate PPE violates regulations and exposes employers to citations and liability.
“PPE isn’t optional equipment for serious spills,” Greco emphasizes. “I’ve seen custodians try to clean up battery acid with dish gloves and a dust mask. That’s not protection—that’s a hospital visit waiting to happen. If you can’t gear up properly, don’t start the cleanup.”
Spill Response Equipment
Spill kits should be stationed strategically throughout your facility, particularly near:
- Chemical storage rooms
- Janitorial closets
- Mechanical rooms
- Loading docks
- Maintenance shops
- Laboratory spaces
Universal Spill Kit Contents
A basic 30-gallon capacity kit includes:
- 20-30 absorbent pads (15″ x 18″)
- 2-3 absorbent socks (3″ x 48″)
- 2 absorbent rolls for large area coverage
- Disposal bags and ties
- PPE (gloves, goggles, coveralls)
- Spill kit instruction card
Chemical-Specific Additions
Facilities storing acids or bases should add:
- pH test strips to verify neutralization
- Sodium bicarbonate (baking soda) for acid neutralization
- Citric acid for base neutralization
- Solidifying agents for liquid containment
Water Damage Response Equipment
Professional-grade water extraction equipment includes:
- Wet/dry shop vacuums (minimum 12-gallon capacity)
- Submersible pumps for high-volume extraction (2-inch discharge minimum)
- Moisture meters (pin-type and non-invasive)
- Infrared thermometers for surface temperature monitoring
- Air movers (1/2 HP minimum, 2000+ CFM)
- Dehumidifiers (commercial-grade LGR units)
According to psychrometrics in drying principles, proper equipment placement can reduce drying time from weeks to days while preventing secondary damage.
Inspection and Maintenance Schedules
Spill kit inventory checks should occur monthly using a standardized PPE inspection checklist. Document inventory levels against inventory par levels and establish reorder triggers for absorbents at 50% depletion.
An equipment maintenance log tracks:
- Battery condition and charge dates for cordless equipment
- Filter replacement for air movers and dehumidifiers
- Calibration dates for moisture meters
- Hose and power cord condition
- Eyewash station weekly activation testing
Step-by-Step Response Procedures by Emergency Type
Different facility emergencies demand distinct response protocols. This section provides detailed cleanup procedures for the most common commercial facility incidents.
Water Leaks and Intrusion
Water intrusion cleanup becomes exponentially more complicated with each hour of delay. The first 24 hours determine whether you face a cleanup operation or a full restoration project.
Water Damage Categories Explained
Understanding Contamination Levels per IICRC S500 Standards
Initial Scene Size-Up
Begin with initial scene size-up:
- Identify water category: Clean (Category 1), gray (Category 2), or black (Category 3)
- Estimate affected area: Square footage and depth of standing water
- Check for electrical hazards: Never enter areas with electrical equipment in contact with water until power is secured
- Assess structural stability: Water-saturated ceilings can collapse
“Water doesn’t respect property lines,” Greco notes. “That roof leak you’re seeing in the conference room? Water could have been traveling through walls and ceilings for hours before you noticed. Always assume the damage is more extensive than it appears.”
Burst Pipe Response Protocol
Burst pipe mitigation follows this sequence:
- Shut off water supply at the closest valve or main shutoff
- Alert occupants and evacuate affected areas if ceilings sag
- Document damage with photos and video for insurance
- Begin water extraction immediately—every gallon removed reduces drying time
- Remove wet contents—furniture, boxes, equipment
- Pull wet carpet within 24-48 hours (pad should be discarded)
- Set up air movers and dehumidifiers
- Monitor drying progress with moisture meters twice daily
For server room leak protocol, immediate power shutdown coordination prevents equipment damage and electrical shock risks. IT equipment water exposure requires specialized drying procedures—simply letting electronics “dry out” often leaves mineral deposits that cause failures weeks later.
Roof Leak Management
Roof leak response during active weather events requires temporary containment until repairs can be made:
- Contain interior drips with buckets and waterproof tarps
- Move vulnerable items away from leak points
- Photograph ceiling tile leak indicators—staining patterns reveal water travel paths
- Remove saturated ceiling tiles to prevent collapse and allow air circulation
- Set up air movers pointed at ceiling cavities
- Schedule emergency roof repair once weather permits
The ceiling tile replacement criteria: any tile showing water staining should be replaced even after drying, as residual contamination can harbor mold and create odor issues.
Sewage Backup Cleanup
Sewer backup cleanup situations involve Category 3 black water contaminated with human waste, requiring strict biohazard cleanup protocol:
- Evacuate the area immediately—sewage contains pathogenic bacteria and viruses
- Turn off HVAC systems serving affected areas to prevent contamination spread
- Call professional restoration services—this is not a DIY cleanup situation
- Document extent of contamination for insurance and health department reporting
Professional cleanup includes antimicrobial treatment, removal of porous materials that can’t be adequately disinfected (drywall, carpet, insulation), and ATP hygiene testing to verify bacterial removal before reoccupation.
HVAC-Related Water Issues
HVAC condensate overflow often results from clogged drain lines or failed condensate pumps:
- Turn off the HVAC unit to stop water production
- Clear condensate line flush—disconnect and clean drain lines
- Check condensate pump operation and replace if failed
- Clean and treat drain pan with algaecide tablets
- Dry affected areas using fans and dehumidifiers
A monthly HVAC drain pan treatment with algae control tablets prevents biological growth that clogs lines and causes overflows.
Chemical Spill Response
Chemical spill response procedures protect staff from exposure while containing and neutralizing hazardous substances. The cleanup approach depends entirely on spill size, chemical type, and your team’s training level.
Pre-Response Safety Assessment
Before any cleanup begins:
- Consult the Safety Data Sheet (SDS): Every chemical must have an SDS accessible to all employees per OSHA Hazard Communication Standard 1910.1200
- Identify hazard pictograms: GHS pictograms on labels instantly communicate health, fire, and reactivity risks
- Check NFPA 704 ratings: The colored diamond shows health (blue), flammability (red), and reactivity (yellow) hazards on a 0-4 scale
- Verify adequate ventilation: Many chemicals produce toxic vapors requiring solvent spill ventilation to keep airborne concentrations below VOC exposure limits
“The SDS is your emergency response bible,” Greco stresses. “It tells you exactly what PPE you need, how to neutralize the chemical, and what health effects you’re risking if you guess wrong. Anyone cleaning up chemicals without reading the SDS first is gambling with their safety.”
Small Chemical Spill Procedures
A small chemical spill (less than one liter, non-hazardous classification) can be handled by trained custodial staff if proper equipment is available:
- Don PPE: Minimum of nitrile gloves, goggles, and apron (add respirator if vapors present)
- Contain the spill: Surround with absorbent socks to prevent spreading
- Apply appropriate absorbent: Universal pads for most liquids, specialized absorbents for acids/bases
- Neutralize if required: Use pH test strips to verify neutralization completion
- Collect saturated materials: Place in sealed disposal bags
- Clean the surface: Wipe area with appropriate cleaning solution
- Dispose properly: Follow facility hazardous waste procedures
- Document the incident: Complete incident report with chemical identity, quantity, and actions taken
For battery acid spill response, apply sodium bicarbonate (baking soda) to neutralize sulfuric acid, watching for fizzing reaction to stop before final cleanup.
When to Call Professionals
Large chemical spills or certain chemical types require professional emergency cleaning service response:
- Spills exceeding one gallon
- Unknown substance identification
- Flammable liquids creating fire risk
- Corrosives (pH < 3 or > 11)
- Reactive chemicals that generate heat, gas, or explosions when mixed
- Toxic substances with low exposure thresholds
- Any situation where vapors cause respiratory distress
Staff attempting cleanup beyond their training level violates OSHA regulations and creates employer liability for resulting injuries or exposures.
Common Workplace Chemical Incidents
Janitorial Products
The most common facility chemical spills involve cleaning products. Key concerns:
- Ammonia and bleach incompatibility: NEVER mix these—the reaction produces deadly chlorine gas hazard
- Sodium hypochlorite dilution: Bleach spills require ventilation and immediate cleanup before hypochlorous acid vapors cause respiratory irritation
- Quaternary ammonium disinfectant: Quats are generally low-hazard but require gloves to prevent skin sensitization
Proper janitor closet chemical storage includes segregation of incompatibles—acids separated from bases, oxidizers away from flammables. Dilution station safety with proper metering tip selection and labeling of secondary containers prevents accidental mixing.
Laboratory Chemicals
Laboratory spill categories range from benign salts to highly toxic reagents. Facilities with lab spaces require specialized response equipment:
- Acid cabinet leak containment trays
- Solvent cabinet ventilation to prevent vapor accumulation
- Multiple spill kit types for different chemical classes
- Personnel trained to OSHA 1910.120 HAZWOPER awareness level minimum
Industrial Environments
Manufacturing and maintenance areas present unique spill scenarios:
- Forklift battery spill: Concentrated sulfuric acid requires immediate neutralization and professional disposal
- Hydraulic fluid leaks: Petroleum-based fluids create slip hazards and environmental contamination
- Cutting fluid spills: Water-based metalworking fluids harbor bacteria and become biohazards if left standing
- Warehouse racking drip trays: Preventive containment for stored liquid containers
Biohazard and Bodily Fluid Cleanup
Biohazard cleanup protocol protects workers from infectious disease transmission while properly disinfecting contaminated surfaces. OSHA 1910.1030 bloodborne pathogens standard mandates specific training and procedures for anyone potentially exposed to blood or other potentially infectious materials (OPIM).
Bloodborne Pathogen Basics
Bloodborne pathogens are microorganisms in blood that cause disease in humans:
- Hepatitis B virus (HBV): Can survive in dried blood at room temperature for seven days
- Hepatitis C virus (HCV): Causes chronic liver disease
- Human Immunodeficiency Virus (HIV): Attacks immune system
Other potentially infectious materials include:
- Semen and vaginal secretions
- Cerebrospinal, synovial, pleural, peritoneal, pericardial, and amniotic fluids
- Any body fluid visibly contaminated with blood
- Unfixed human tissues and organs
- Saliva in dental procedures
Required Training and Vaccination
Employees with occupational exposure to bloodborne pathogens must receive:
- Initial training before assignment to tasks with exposure potential
- Annual refresher training
- Hepatitis B vaccination series offered at no cost within 10 days of initial assignment
- Post-exposure evaluation and follow-up if an exposure incident occurs
Biohazard Cleanup Procedure
- Don appropriate PPE: Disposable gloves (double-glove for large spills), face protection if splashes possible, gown or apron
- Control access: Prevent others from entering contaminated area
- Absorb liquids: Cover blood or bodily fluids with paper towels or absorbent materials
- Collect solid waste: Pick up glass, sharps, or debris using mechanical means (forceps, dustpan)—never use hands directly
- Place sharps in puncture-resistant container: All sharps, even if not visibly contaminated, require sharps container handling
- Clean visible contamination: Use disposable towels and EPA-registered disinfectant
- Apply disinfectant: Allow proper contact time verification—typically 10 minutes minimum for bloodborne pathogens
- Dispose of waste properly: Place all contaminated materials in red biohazard bags
- Remove PPE carefully: Peel gloves off inside-out, wash hands thoroughly
- Document incident: Record what happened, cleanup procedures, and names of exposed individuals
“Bodily fluid cleanup isn’t a job for your general custodial staff unless they’ve been specifically trained and vaccinated,” Greco explains. “One needle stick, one splash to the eye, and you’re talking about post-exposure prophylaxis, HIV testing, and potentially life-changing consequences. This is an area where ‘good enough’ simply doesn’t exist.”
Effective Disinfection for Biohazards
EPA List N disinfectants are pre-approved for emerging pathogens. For bloodborne pathogen cleanup, effective options include:
- Sodium hypochlorite (bleach) solution: 1:10 dilution (1 part bleach to 9 parts water) provides 5,000-6,000 ppm available chlorine. Requires 10-minute contact time.
- Hydrogen peroxide disinfectant: 3% to 7.5% solutions with 10-minute contact time
- Quaternary ammonium disinfectant: Hospital-grade quats with bloodborne pathogen claims
- Peracetic acid use cases: Sporicidal activity for C. difficile contamination situations
Critical note on disinfectant dwell time: Wiping a surface and immediately rinsing provides zero disinfection. The product must remain wet on the surface for the full contact time specified on the label.
Specialized Biohazard Situations
Restroom Bodily Fluid Events
Spray-and-vac restroom recovery using disinfectant solutions and wet vacuum extraction addresses vomit and fecal incidents efficiently. Urine enzyme cleaners break down organic compounds causing odor rather than just masking smells.
Healthcare Facility Pathogens
Medical offices and clinics face additional pathogen concerns:
- MRSA contamination response: Methicillin-resistant Staphylococcus aureus requires special disinfectants and thorough surface cleaning
- C. difficile spore cleaning: Only sporicidal products (bleach, peracetic acid) kill resilient bacterial spores
- Norovirus surface disinfection: Requires minimum 5,000 ppm chlorine concentration with 10-minute contact time
Our article on cleaning medical offices provides detailed protocols for healthcare environments.
Regulated Medical Waste Handling
Regulated medical waste from biohazard cleanup requires specific handling:
- Red biohazard bags clearly labeled with biohazard symbol
- Puncture-resistant sharps containers (never more than 3/4 full)
- Waste segregation and labeling by waste stream
- Storage in secure area away from public access
- Licensed medical waste hauler disposal
Improper disposal of regulated medical waste violates state health department regulations and can result in significant fines.
When to Call Professional Emergency Cleaning Services
The decision to handle cleanup in-house versus calling specialized cleaning professionals involves careful risk assessment. Making the wrong choice exposes your organization to liability, regulatory violations, and preventable property damage.
DIY vs Professional Cleanup Decision Tree
Quick Assessment Guide for Facility Managers
- Under 100 sq ft
- Single room only
- Contained spill
- Over 500 sq ft
- Multiple rooms/floors
- Building-wide impact
- Category 1 water
- Common cleaners
- Non-hazardous spills
- Cat 2/3 water
- Biohazards/blood
- Hazardous chemicals
- OSHA certified
- Proper PPE available
- Equipment on-site
- SDS reviewed
- No training
- Missing PPE
- No equipment
- Unknown chemicals
- Adequate equipment
- 24/7 monitoring possible
- Limited affected materials
- Insufficient equipment
- Can’t monitor 24/7
- Extensive saturation
Size and Scope Considerations
Square Footage Thresholds
Water damage exceeding 500 square feet meets EPA criteria for professional remediation due to increased mold colonization risk. Large-scale events require equipment and staffing beyond typical facility capabilities:
- 10+ air movers for proper airflow patterns
- Multiple industrial dehumidifiers to achieve target drying rates
- 24/7 monitoring with regular moisture mapping
- Truck-mounted extraction equipment for deep water removal
Vertical Spread
Water traveling through multiple floors creates hidden damage in wall cavities, ductwork, and above-ceiling spaces. Professional remediators use thermal imaging for moisture detection and moisture meter readings to map the full extent of saturation invisible to the eye.
Contamination Level
Category 3 Black Water
Any water contaminated with sewage, chemicals, or floodwater requires professional emergency cleaning service intervention. Category 3 cleanup involves:
- Removal of non-salvageable porous materials (drywall, insulation, carpet)
- Antimicrobial application to all affected surfaces
- HEPA vacuuming technique to remove contaminated dust
- ATP hygiene testing to verify bacterial removal
- Air quality clearance testing before reoccupation
Hazardous Material Spills
OSHA 1910.120 HAZWOPER regulations distinguish between “incidental releases” that employees can clean up and larger spills requiring emergency response contractor intervention. Call professionals for:
- Spills requiring evacuate beyond the immediate area
- Chemicals posing significant health or environmental threats
- Unknown substances requiring identification
- Situations exceeding your team’s training and equipment capabilities
Time Sensitivity Requirements
Mold Prevention Deadlines
The ANSI/IICRC S520 mold remediation standard emphasizes 24-48 hour drying goals to prevent fungal colonization. Missing this window means elevated mold growth risk requiring more extensive (and expensive) remediation:
- 24 hours: Bacterial growth begins in standing water
- 48 hours: Mold spores begin colonizing wet materials
- 72 hours: Visible mold growth likely on porous surfaces
- 1 week: Extensive mold growth and potential structural damage
“I tell facility managers that the clock starts ticking the moment water appears, not when it’s convenient to deal with,” Greco advises. “Waiting until Monday morning to address a Friday afternoon leak virtually guarantees you’ll be dealing with mold remediation instead of simple water extraction.”
Business Continuity Pressures
Operations that can’t afford multi-day closures need professional rapid response:
- 24/7 emergency response availability
- Larger crew sizes for faster completion
- Industrial equipment for accelerated drying
- Temporary facilities if needed for critical areas
Specialized Equipment Requirements
Professional restoration companies deploy equipment most facilities don’t own:
- Hydroxyl generators for odor elimination without ozone’s corrosive effects
- Thermal foggers for deep deodorization
- Trailer-mounted extraction units for high-volume water removal
- Injectidry systems for drying hardwood floors and wall cavities without demolition
- Negative air machines with HEPA filtration for containment
Regulatory and Insurance Factors
OSHA Compliance Protection
Professional cleaning services carry appropriate insurance and worker training certifications that protect building owners from liability. Their employees are:
- Trained to OSHA 1910.1030 bloodborne pathogens standards
- Certified in confined space entry if required
- Equipped with proper PPE and respiratory protection
- Covered by workers’ compensation insurance for occupational injuries
Insurance Documentation
Professional remediators provide detailed insurance claim documentation:
- Moisture mapping with thermal images
- Daily documentation photos
- Equipment logs and drying charts
- Itemized scope of work
- Certificate of completion
This documentation supports claims and demonstrates due diligence in preventing secondary damage.
Creating Your Emergency Response Plan
A written emergency action plan transforms crisis response from reactive chaos into systematic execution. OSHA 1910.38 requires facilities with more than 10 employees to maintain a written emergency action plan covering fire, evacuation, and other emergencies.
Emergency Preparedness Master Checklist
Essential Systems, Equipment & Training for Facility Emergency Response
Plan Components
Emergency Contact Directory
Your emergency contact list should include:
- Internal contacts: Building management, security, safety officer, department heads
- External emergency services: Fire, police, ambulance, poison control
- Utility companies: Electric, gas, water, sewer (with account numbers)
- Service vendors: Emergency cleaning services, restoration contractors, plumbers, electricians, HVAC technicians
- Insurance contacts: Agent, adjuster, 24-hour claims number
- Regulatory agencies: OSHA area office, state environmental agency for reportable spills
Distribute laminated cards with critical numbers to all supervisory staff and post lists in security offices, janitorial closets, and reception areas.
Facility Infrastructure Map
Create a site map with shutoffs showing:
- Water shutoff valves (main and by zone)
- Gas shutoff locations
- Electrical panels and main breaker
- Fire suppression system controls
- Elevator machine rooms
- HVAC equipment locations
- Storm drains and sewer cleanouts
- Chemical storage areas
- Emergency eyewash and safety shower stations
Color-code different systems and include photos of valve locations so anyone can quickly identify critical shutoffs during emergencies.
Response Protocols by Emergency Type
Document response protocols for common scenarios:
- Water emergencies: Shutoff procedures, extraction priorities, drying timelines
- Chemical spills: Size thresholds for internal vs. professional response, PPE requirements, neutralization procedures
- Biohazard incidents: Isolation procedures, approved cleanup personnel, disinfection requirements
- Fire aftermath: Smoke and soot cleanup, water damage from suppression systems
- Weather events: Roof leak response, flood mitigation, winter freeze protection
Each protocol should follow the Stop-Alert-Contain-Clean framework with specific steps for that emergency type.
Evacuation and Safety Procedures
Include an evacuation decision tree that helps supervisors determine when incidents require building evacuation versus area containment. Consider factors like:
- Toxic vapor generation
- Fire or explosion risk
- Structural integrity concerns
- Large-scale flooding
- Utility failures affecting life safety systems
Training and Drills
Emergency preparedness training ensures your staff can execute the plan under stress:
Initial Training
All employees should receive orientation covering:
- Alarm meanings and evacuation routes
- Location of emergency equipment
- Reporting procedures for spills and leaks
- Basic first aid for chemical exposures
Role-Specific Training
Personnel with emergency response duties require detailed instruction:
- Facility managers: Full emergency action plan, decision authority, utility shutoff procedures
- Custodial supervisors: Spill response procedures, equipment operation, when to call for help
- Maintenance staff: Water extraction techniques, HVAC system shutdown, mechanical failures
- Security personnel: Area restriction, emergency contact protocols, documentation
Practice Drills
Conduct emergency drills at least annually:
- Tabletop exercises: Walk through hypothetical scenarios discussing decisions and actions
- Functional drills: Practice specific skills like spill kit deployment or water extraction
- Full-scale exercises: Simulate complete emergency response with multiple departments
“I’ve seen businesses with beautiful emergency plans sitting in three-ring binders that nobody’s ever actually practiced,” Greco observes. “When water’s pouring through your ceiling at midnight, you don’t want that to be the first time someone tries to remember where the shutoff valve is. Drill the plan until the responses become automatic.”
Drill Documentation
Record each drill including:
- Date and participants
- Scenario description
- Response times achieved
- Problems identified
- Corrective actions needed
Update your emergency plan based on drill findings and incident reviews.
Preventive Maintenance Integration
Many facility emergencies stem from deferred maintenance. A robust preventive maintenance schedule reduces emergency frequency:
Plumbing Systems
- Water leak sensors: Install electronic detectors in mechanical rooms, under sinks, near water heaters
- Smart shutoff valves: Automated valves that close when sensors detect leaks
- Pipe insulation inspection: Check for deterioration annually, especially in unconditioned spaces
- Hose replacement: Replace washing machine and toilet supply hoses every 5 years
Roof and Building Envelope
- Roof inspection checklist: Twice-annual examinations looking for ponding, membrane damage, flashing failures
- Gutter downspout failure signs: Check for proper drainage, clear blockages before rainy seasons
- Roof drain blockage response: Monthly cleaning of drains and scuppers
- Window and door seal integrity: Annual caulking and weatherstripping inspection
HVAC Systems
- Condensate line flush: Quarterly cleaning prevents overflow events
- Drain pan inspection: Check for rust, blockage, and proper slope
- Filter replacement: Monthly during high-use seasons
- Coil cleaning: Annual maintenance prevents ice formation and water overflow
Chemical Storage
- Chemical inventory log: Track quantities, expiration dates, storage locations
- Secondary containment inspection: Verify spill pallets and containment systems intact
- Incompatible segregation: Quarterly audit of chemical storage areas
- SDS binder updates: Ensure current Safety Data Sheets for all stored chemicals
Post-Emergency Documentation and Review
The emergency response doesn’t end when the mop bucket empties. Proper incident report documentation and systematic post-incident review processes turn reactive emergencies into learning opportunities that prevent future occurrences.
Immediate Incident Documentation
Record details while they’re fresh:
Basic Information
- Date, time, and location of incident
- Person discovering the emergency
- Initial conditions (water depth, spill size, contamination extent)
- Weather conditions for water intrusion events
Response Actions
- Source control measures taken
- Personnel notified and response times
- Equipment used
- External contractors engaged
- Timeline of major response milestones
Visual Documentation
Capture extensive photos and video:
- Initial conditions: Damage extent before cleanup begins
- During response: Equipment placement, affected areas
- Final conditions: Completed restoration
- Equipment readings: Moisture meter displays, thermal images
Time-stamp all images for insurance documentation. Take photos from multiple angles and include reference objects for scale.
Material and Cost Tracking
Document all emergency-related expenses:
- Materials consumed (absorbents, PPE, cleaning agents)
- Equipment rental costs
- Labor hours (internal staff and contractors)
- Damaged property requiring replacement
- Business interruption impacts
Post-Incident Review Process
Schedule a post-incident review within one week of completing emergency response. Include all stakeholders:
- Facility management
- Safety officer
- Responding personnel
- Department managers from affected areas
- External contractors if involved
Review Agenda
- Incident timeline: Walk through what happened chronologically
- Response effectiveness: What worked well? What could improve?
- Plan adequacy: Did emergency procedures address this scenario?
- Equipment performance: Was the right equipment available and functional?
- Training gaps: Where did personnel lack necessary knowledge or skills?
- Communication assessment: Were the right people notified promptly?
Root Cause Analysis
Go beyond the immediate trigger to identify underlying causes:
- Immediate cause: What directly caused the incident? (pipe burst, container tipped, etc.)
- Contributing factors: What conditions allowed it to happen? (coroded pipe, improper storage, inadequate training)
- Root causes: What systemic issues enabled the contributing factors? (deferred maintenance, insufficient budget, lack of inspection program)
Use the “Five Whys” technique—ask “why” five times to drill down from symptoms to root causes.
Corrective Actions Development
Create a corrective actions list with:
- Specific action to be taken
- Responsible person assigned
- Target completion date
- Resources required
- Verification method
“Every emergency teaches you something about your facility and your readiness,” Greco explains. “The goal isn’t to never have incidents, that’s unrealistic. The goal is to never have the same incident twice for the same reason. If you’re not doing post-incident reviews, you’re not learning.”
Insurance Claims Process
Many facility emergencies result in insurance claims. Proper documentation supports favorable outcomes:
Immediate Claim Notification
Contact your insurance carrier within 24 hours of major incidents. Provide:
- Policy number and insured location
- Date and time of loss
- Type of incident (water damage, vandalism, etc.)
- Preliminary damage estimate
- Immediate mitigation steps taken
Required Documentation
Gather for the adjuster:
- Completed incident report
- Photos and video documentation
- Contractor invoices and estimates
- Equipment rental receipts
- Inventory of damaged property
- Business interruption calculations if applicable
Coverage Considerations
Understand your coverage for water damage:
- Sudden and accidental discharge: Typically covered (burst pipes, supply line failures)
- Flood: Usually excluded, requires separate flood insurance
- Seepage and leakage: May have limited coverage or exclusions
- Mold: Often has sub-limits or exclusions if resulted from maintenance neglect
Return to Service Protocols
Before reopening affected areas, complete a return-to-service timeline:
Technical Clearance
Verify completion of:
- Drying goals: Moisture readings at or below pre-loss levels
- Structural safety: No compromised building elements
- Air quality: Third-party indoor air testing if mold suspected
- Electrical safety: Systems checked by licensed electrician if wet
Functional Restoration
Ensure:
- All systems operational (HVAC, plumbing, electrical)
- Replaced materials meet building codes
- Cleaning and disinfection completed
- Odor eliminated (not just masked)
Communication
Issue employee reoccupation notice explaining:
- What happened
- Response actions taken
- Clearance testing results
- Any remaining limitations or restrictions
A before-open reentry checklist walked through by safety personnel provides final verification before regular operations resume.
Building a Relationship with Emergency Cleaning Services
Waiting until water floods your facility to find a qualified emergency cleaning service puts you in reactive mode during your most stressful moments. ProActive facility managers establish vendor relationships before emergencies strike.
Pre-Emergency Vendor Selection
Evaluate commercial cleaning services for emergency response capability:
24/7 Availability
Emergency response companies must offer:
- Live answer phone lines (not voicemail)
- Guaranteed response time (typically 60-90 minutes)
- Weekend and holiday coverage
- On-call technician rotation
“When you’re dealing with a burst pipe at 11 p.m. on Saturday, voicemail doesn’t cut it,” Greco emphasizes. “You need someone who picks up the phone and heads to your facility immediately. That’s the difference between minor water damage and ripping out your entire ground floor.”
Certification and Training
Look for providers with:
- IICRC certification (Institute of Inspection, Cleaning and Restoration Certification)
- OSHA training documented for all technicians
- Specialized certifications for biohazard cleanup
- Continuing education participation
Equipment Inventory
Verify access to:
- High-volume water extraction equipment
- Commercial dehumidifiers and air movers
- Moisture detection instruments
- Containment barriers and negative air machines
- Specialized cleaning and disinfection equipment
Insurance and Bonding
Confirm:
- General liability insurance (minimum $2 million)
- Workers’ compensation coverage
- Commercial auto insurance
- Surety bonding for financial protection
Request certificates of insurance naming your facility as additional insured.
Service Agreements and Response Plans
Establish a formal relationship before emergencies occur:
Emergency Response Agreement
Document:
- Response time commitments
- After-hours contact procedures
- Standard rates for emergency services
- Equipment and personnel availability
- Billing and payment terms
Facility Walkthrough
Have the vendor tour your location to:
- Identify high-risk areas
- Note utility shutoff locations
- Understand access procedures (keys, security, after-hours entry)
- Review building layout and priority areas
- Discuss facility-specific concerns
This pre-planning dramatically reduces response time when seconds count.
Communication Protocols
Establish who contacts the vendor and how:
- Primary and backup emergency contact names
- Approval authority for work authorization
- Progress update frequency
- Decision-maker hierarchy
Why Facility Managers Trust ProTex for Emergencies
ProTex Janitorial Services serves as the emergency response partner for commercial facilities throughout the Inland Northwest. With operations spanning from Sandpoint to Spokane, the company responds to facility cleaning emergencies 24/7/365.
“We’ve built our emergency response capability over 30 years of real-world experience,” Greco explains. “Our technicians have seen everything from frozen pipes flooding manufacturing floors to chemical spills in school science labs. That experience means we can walk into your emergency, quickly assess what’s needed, and execute the response efficiently.”
ProTex emergency services include:
- Water extraction and drying for burst pipes, roof leaks, and flood events
- Biohazard cleanup following proper OSHA protocols
- Chemical spill response (non-hazmat classification)
- Post-fire cleanup and smoke/soot removal
- Sewage backup cleanup with proper antimicrobial treatment
- Storm damage response
The company maintains fully equipped emergency response vehicles with extraction equipment, air movers, dehumidifiers, and complete PPE. All technicians receive ongoing training in emergency protocols, safety procedures, and specialized cleaning techniques.
Facilities can reach ProTex emergency response at (208) 263-6202. The company provides free emergency response consultations to discuss your facility’s specific risks and develop customized preparedness plans.
Learn more about ProTex’s complete cleaning services for office buildings, medical facilities, manufacturing plants, and other commercial properties.
Frequently Asked Questions
What should I do first when I discover a facility cleaning emergency?
Stop the source if possible (shut off water, upright spilled containers), alert facility management and emergency services if needed, contain the affected area to prevent spreading, then begin cleanup or call professional services based on the situation’s severity.
How quickly should water damage be addressed to prevent mold?
Water extraction should begin within 24 hours, with complete structural drying achieved within 48-72 hours. Mold colonization begins after 48 hours of moisture exposure, making immediate response critical for preventing extensive remediation costs.
Can my custodial staff clean up blood and bodily fluids?
Only if they have completed OSHA bloodborne pathogens training, been offered hepatitis B vaccination, and have access to appropriate PPE. Small spills may be within trained staff capabilities, but significant contamination requires professional biohazard cleanup services.
What’s the difference between Category 1, 2, and 3 water damage?
Category 1 is clean water from sanitary sources, Category 2 is gray water with contaminants (like washing machine overflow), and Category 3 is black water containing sewage or other hazardous contamination. Category 3 always requires professional cleanup.
When should I evacuate a building during a cleaning emergency?
Evacuate if chemical vapors cause respiratory distress, structural integrity is compromised (sagging ceilings from water weight), fire or explosion risk exists, or you cannot identify spilled substances. Always err on the side of caution.
How do I know if my facility needs professional emergency cleaning services?
Call professionals for water damage exceeding 500 square feet, Category 3 contamination, hazardous chemical spills, biohazard situations beyond staff training, structural concerns, or any situation where DIY cleanup would violate OSHA regulations or risk employee safety.
What should be included in a facility emergency spill kit?
Universal absorbent pads and socks, PPE (nitrile gloves, goggles, coveralls), disposal bags, neutralizing agents for acids and bases, pH test strips, caution signs, and spill response procedure cards. Inspect kits monthly and restock after any use.
How long do disinfectants need to stay wet on surfaces?
Contact time (dwell time) varies by product and pathogen but typically ranges from 3-10 minutes. Check the product label for specific requirements. Wiping a surface immediately after applying disinfectant provides no antimicrobial benefit.
What documentation is required after a facility cleaning emergency?
Record the incident timeline, response actions taken, personnel involved, equipment used, material costs, and extensive photos/videos. Complete formal incident reports, document employee exposures, and gather contractor invoices for insurance claims and regulatory compliance.
How often should emergency response training be conducted?
OSHA requires annual refresher training for personnel with emergency response duties. Conduct practical drills at least twice yearly, with tabletop exercises quarterly to maintain skill proficiency and identify plan weaknesses before real emergencies occur.
Conclusion: Preparedness Prevents Disaster
Facility cleaning emergencies test your organization’s preparedness, response capability, and commitment to safety. The difference between controlled incident response and catastrophic property damage often comes down to three factors: having proper emergency equipment immediately accessible, maintaining trained personnel who know response protocols, and establishing relationships with qualified professional cleaning services before emergencies strike.
As Rich Greco emphasizes: “Emergency preparedness isn’t expensive, it’s insurance. The cost of maintaining spill kits, training your staff, and having an emergency cleaning partner on speed dial is nothing compared to the cost of doing those things wrong when a pipe bursts at midnight or a chemical spill shuts down your production line.”
Your action steps:
- Audit current preparedness: Review emergency equipment, spill kit contents, and staff training records against standards discussed in this guide
- Update your emergency action plan: Document response protocols using the Stop-Alert-Contain-Clean framework for common emergencies
- Schedule training: Ensure all personnel with emergency response duties receive appropriate OSHA-compliant training
- Establish vendor relationships: Meet with qualified emergency cleaning services before you need them urgently
- Implement preventive maintenance: Address the underlying facility issues that create emergencies through systematic inspection and repair programs
Facility managers in Coeur d’Alene, Post Falls, Hayden, Spokane, and throughout the Inland Northwest trust ProTex Janitorial Services as their emergency response partner. To discuss your facility’s emergency preparedness needs or request a free emergency response consultation, contact ProTex at (208) 263-6202 or email rich@protexjanitorialservices.com.
Request your free emergency response assessment and gain peace of mind knowing your facility is prepared for whatever unexpected incidents may occur. Because when emergencies strike, preparedness makes all the difference.
For related guidance, explore these resources:
Why Regular Cleaning is Essential in Facilities Management
Workplace Housekeeping Safety: How Cleanliness Prevents Accidents
Working with Your Janitorial Team: A Facility Manager’s Guide
Inland Northwest Winter Office Cleaning: Preventing Illness & Accidents